If you are having problems with the applet above visit the original site: 4-digit by 1-digit multiplication practice at woehler.us.
Sunday, January 31, 2010
Flash Muliplication Resource: 4-digit by 1-digit
I'm working with my lower grade students to help them learn to multiply larger numbers than just the simple math facts. I wanted a way to help them get lots of practice without having to grade lots of problems and still help them get the immediate feedback on how they are doing.
If you are having problems with the applet above visit the original site: 4-digit by 1-digit multiplication practice at woehler.us.
If you are having problems with the applet above visit the original site: 4-digit by 1-digit multiplication practice at woehler.us.
Thursday, January 14, 2010
Inkscape Clock
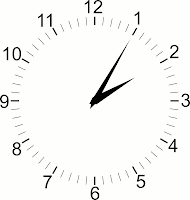
 If you are ever wanting to use an analog clock image check out file available from TpT. It was made using Inkscape and saved as a scalable vector graphic file or svg and can be easily adjusted to say whatever time you want it to. I've used it to create worksheets helping my students learn how to read time on analog clock. The hands are setup so that all you have to do is rotate them, everything else is locked by default so you will not accidentally move it. You can change any of the items in clock to personalize it to meet your needs. The image at the right is an example of what it looks like. If you want to be very precise with your settings rotate the minute hand 6 degrees equals one minute and the rotating the hour hand 0.5 degrees for one minute.
Sunday, January 10, 2010
Quickly Drawing a Figure in Inkscape
Introduction:
In this lesson we will create a simple figure by creating a bunch of shapes and then combine them together. This is a technique used by many traditional drawing books that helps students see the fundamental shapes within an object.
Learning Objectives:
Learn how to use the:
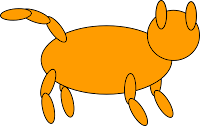
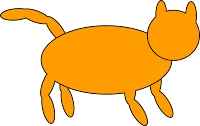
In the cat example below I only used ovals and decided not to join all of the shapes together to give it a little bit of perspective.


In this lesson we will create a simple figure by creating a bunch of shapes and then combine them together. This is a technique used by many traditional drawing books that helps students see the fundamental shapes within an object.
Learning Objectives:
Learn how to use the:
- Shape tools
- Selection tool
- Edit Path tool
- Combining shapes
- Object order
- Select the rectangle tool and draw a rectangle for the body by clicking and dragging the mouse with the button held down until you get the size of the body that you want. Don't worry if it is not exactly like you want you can come back and change it easily later.
- The color and outline or stroke of the body may not be want you want to change that click the fill/stroke button (the paint brush) in the tool bar at the top.
- Now remove the fill by selecting the x. Click the stroke tab and set the outline color.
- Now draw rectangle for the arms and legs.
- Use the circle/oval tool to draw an oval for the head.
- Use the selection tool (the arrow pointer) to make sure that all of the shapes overlap and are about the right size that you wan them to be. Now your drawing should look something like figure one.
- Select all of the shapes by pressing ctrl-a and select union from the objects menu. This will combine them all into one shape. Now your figure should look something like figure 2.
- Now click the Edit Path tool and then click the outline of your figure. You should now see the notes that control the lines. To change the location of a node click it and move it or its handles to the desired location. When you are finished your figure should look something like figure 3.
- Add extra features such as eyes, mouth, hair, etc.... feel free to explore the tools and add extra details.
In the cat example below I only used ovals and decided not to join all of the shapes together to give it a little bit of perspective.


Subscribe to:
Comments (Atom)


